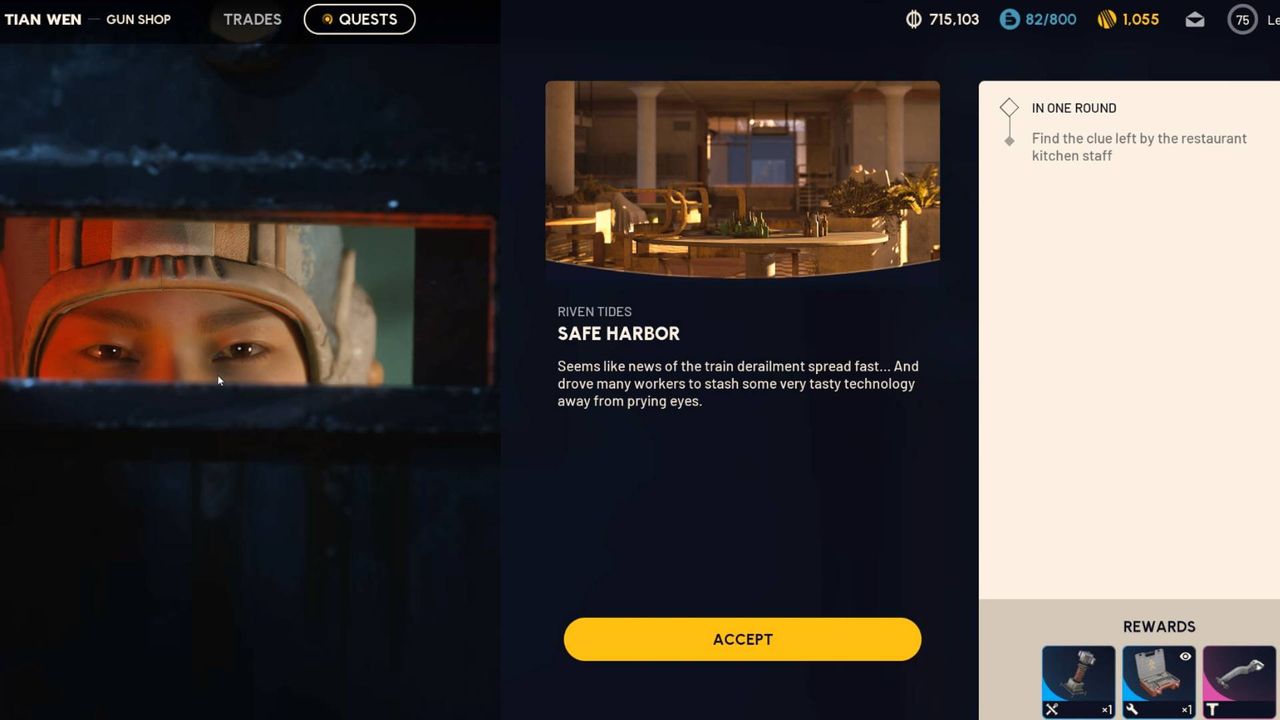
The Arc Raiders Safe Harbour mission is easy once you find the clue in the restaurant

- Where to find the clue left by the restaurant kitchen staff
- Where to find the area portrayed in the sketch
- Safe Harbour rewards
The Arc Raider Safe Harbour mission is short, but can trip you up if you don't know where to get the clue left by the restaurant kitchen staff. You need to find the hotel, but it's a big building and there are four floors to check. Not to mention that it's infested with Shredders, Pops, Fireballs and Ticks. Making it a terrible place to explore if you don't know where you're going. To help you avoid too many painful, burning, shotgun riddled deaths, here's where to go and what to do.
This mission is part of the new Arc Raiders Riven Tides quests including Shoring Up Defenses, Battening Down and A Line in the Sand. There's also a new Arc Raiders Avian Alarm project to complete.
Where to find the clue left by the restaurant kitchen staff in Arc Raiders
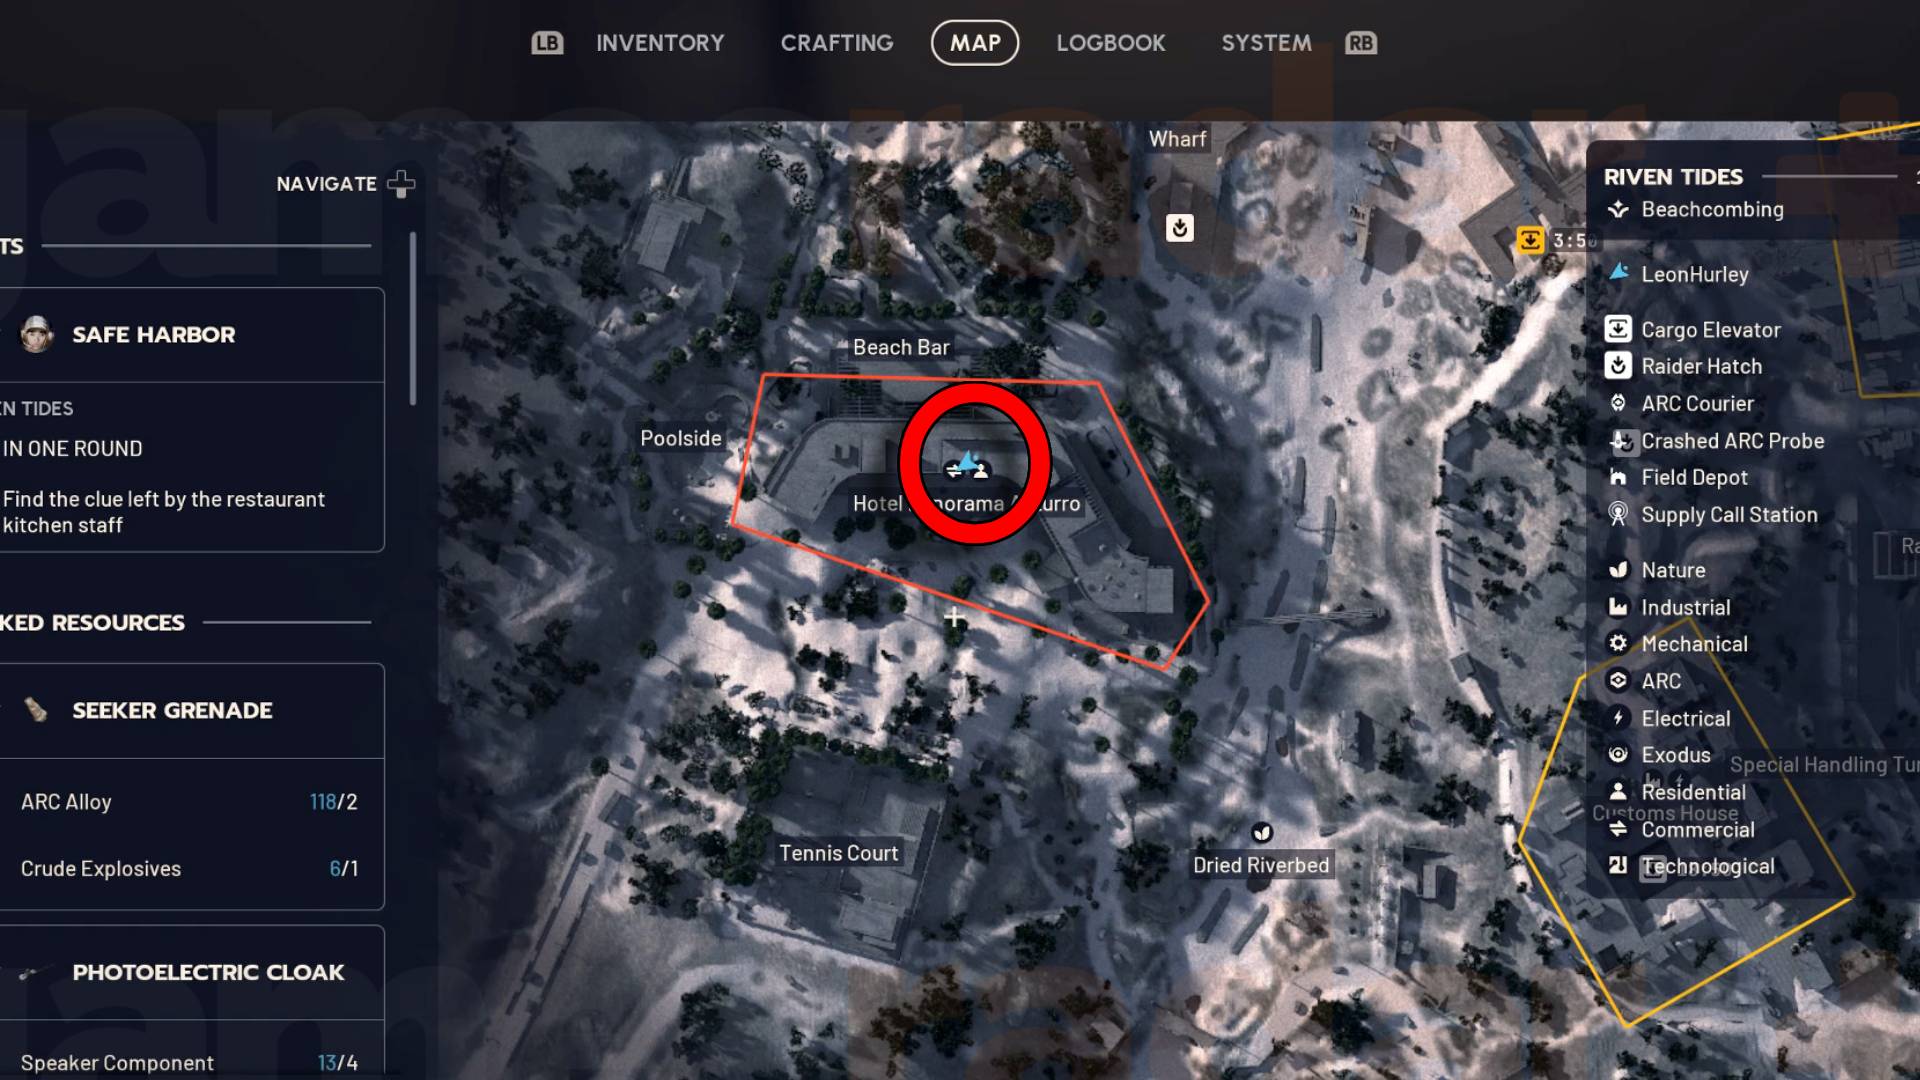
The map above shows exactly where to go to find the clue left by the restaurant kitchen staff for the Safe Harbour quest in Arc Raiders - the Panorama Azzurro hotel. You want to reach the top floor, and the easiest way to do that is to head to the south facing side of the building and look for a zipline going up to the roof. That will take you straight to the fourth floor and then you just have to head east along the length of the building to find the kitchen.
When you reach the dining area, look for the closed off section below, immediately on the right as you go in.
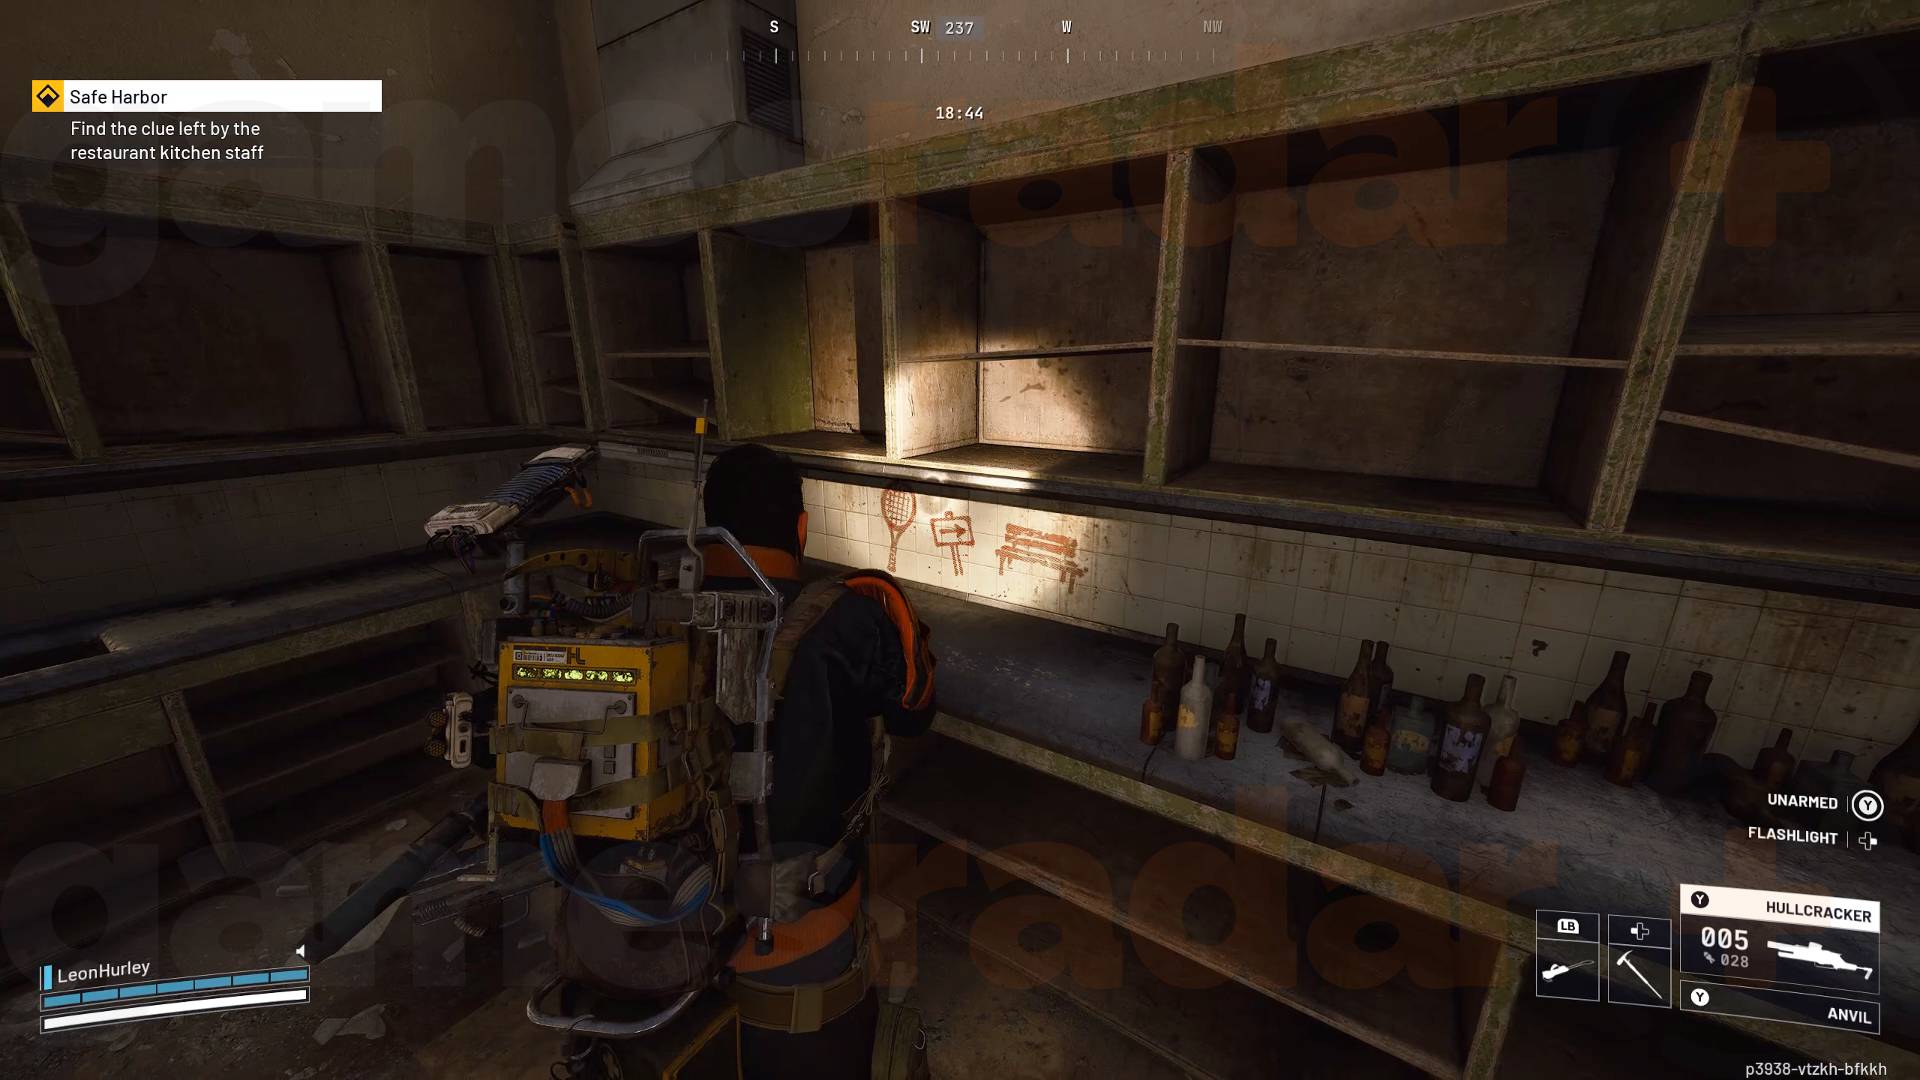
You'll see a little drawing on the wall of a tennis racket and a bench. As soon as you get near that you'll be able to take a photo and trigger the next objective.
Article continues belowWhere to find the area portrayed in the sketch in Arc Raiders
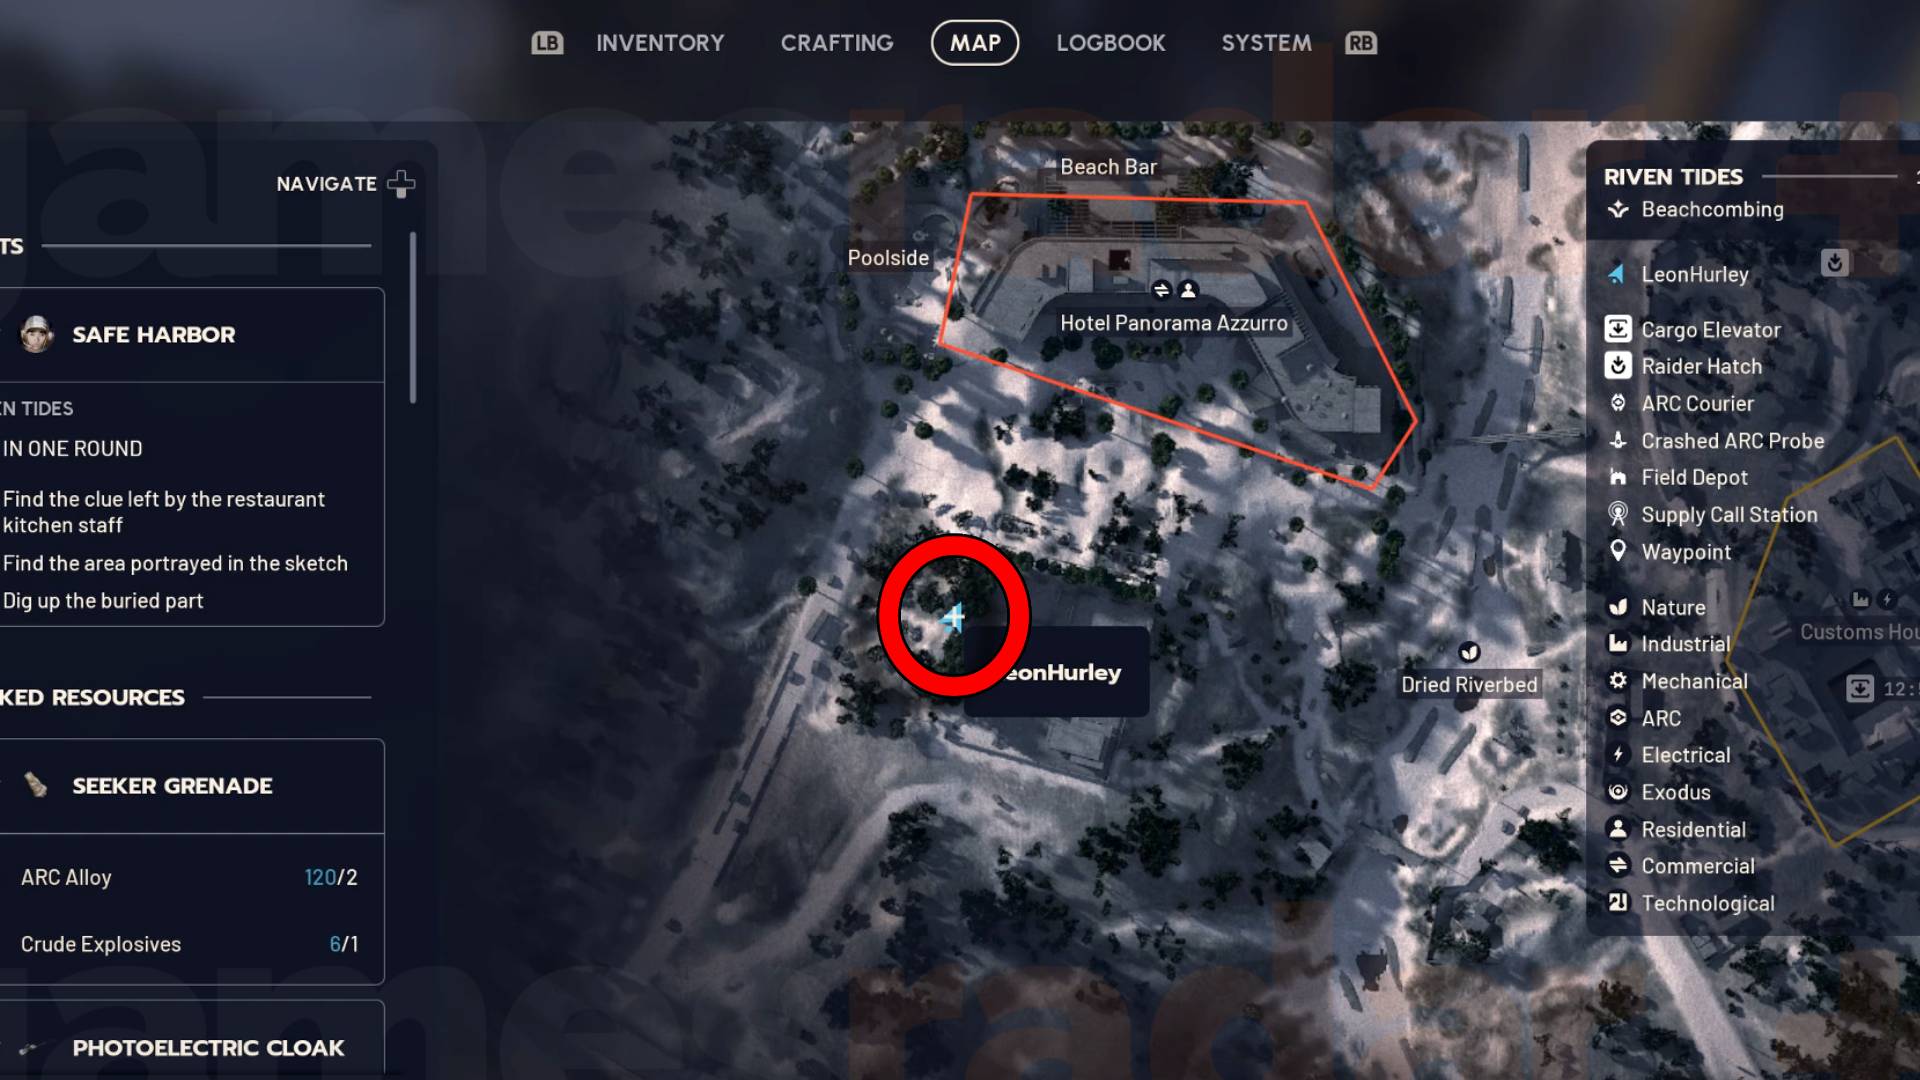
As you can see on the map above there's a tennis court just south ish of the hotel. There are several benches here but if you head to the exact sport marked on the map you'll find the one you need and get the next part of the quest.
Your new objective is to dig up the buried part. That is actually just by the tree behind the bench, although it can be hard to see behind the small wall. There's a tiny pile of disturbed earth and a shovel marking the spot though, and you'll get a prompt to dig it up as soon as you get close.
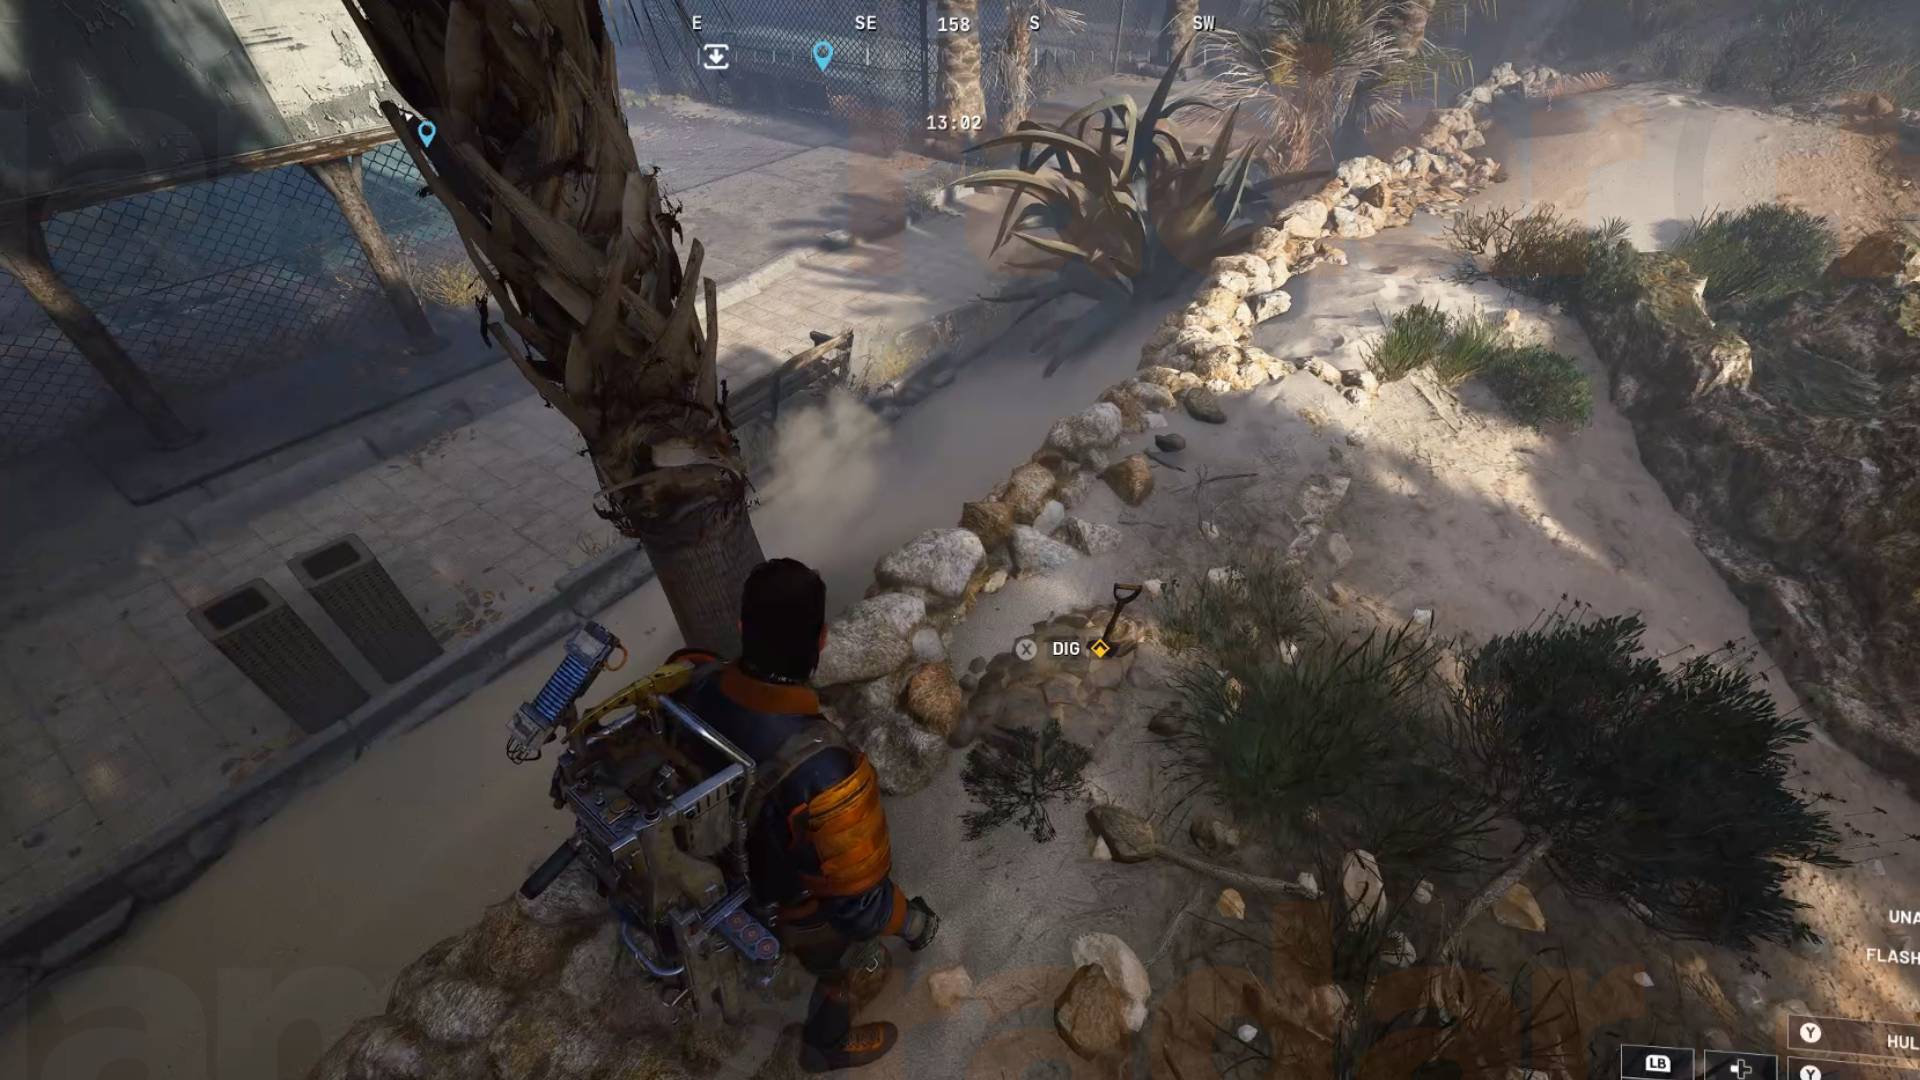
Dig up the [check notes] precision gimble, and you'll have the mission done. All you need to do now is extract with it and head back to Tian Wen to finish Safe Harbour.
Arc Raiders Safe Harbour rewards

Your reward for your efforts is, well, some stuff...
- Surge Coil
- Heavy Gun Parts
- Horizontal Grip weapons mod
© GamesRadar+. Not to be reproduced without permission.
Sign up to the GamesRadar+ Newsletter CATEGORIES
I'm GamesRadar's Managing Editor for guides. I also write reviews, previews and features, largely about horror, action adventure, FPS and open world games. I previously worked on Kotaku, and the Official PlayStation Magazine and website.
View MoreYou must confirm your public display name before commenting
Please logout and then login again, you will then be prompted to enter your display name.
Logout LATEST ARTICLES 1A new Nintendo animated movie is seemingly releasing in 2028, and signs point to the rumored Donkey Kong spin-off
- 2Valve's Gabe Newell saw today's consoles coming: "The consoles are using PC graphics hardware now"
- 3Slay the Spire 2 devs initially wanted to keep updating the original instead of making a sequel
- 4Windrose players are getting destroyed by alpha wolves, but they've come up with a plan
- 5The Blood of Dawnwalker release date has been set for September 2026
Схожі новини

В Україні викрили шахрайський кол-центр, який видурював кошти у військових

По Харкову вгатили БпЛА: є пожежі та інші наслідки у кількох районах міста

All Videos And How To Get Them In Tomodachi Life: Living The Dream
